Employee Onboarding Portal in Zapier
Build a portal for new hires to get everything need in one place, all on Zapier.
When I had a 1972 Honda CB 500 motorcycle, kick starting it was the best.
I thought I was so cool.
Until it wouldn’t start. Then I looked like an angry fool trying to punish metal.
The way you start something sets the stage for how things run. The same is true for your new employees. Why not give them a start that makes them feel James-Dean cool on a cruiser?
Today, I’m going to show you how to build an employee onboarding portal in Zapier in minutes. You can follow along with the employee onboarding template I created.
Kickstart the portal with Canvas
Onboarding workflows are some of the most bulky and powerful Zaps I’ve seen used. There’s just so much admin work for new employees! Perfect for automation. Before building a portal, build yourself a Zap that gives a new hire all the access they need.
Part of their access will be to the portal. So let’s build it out.
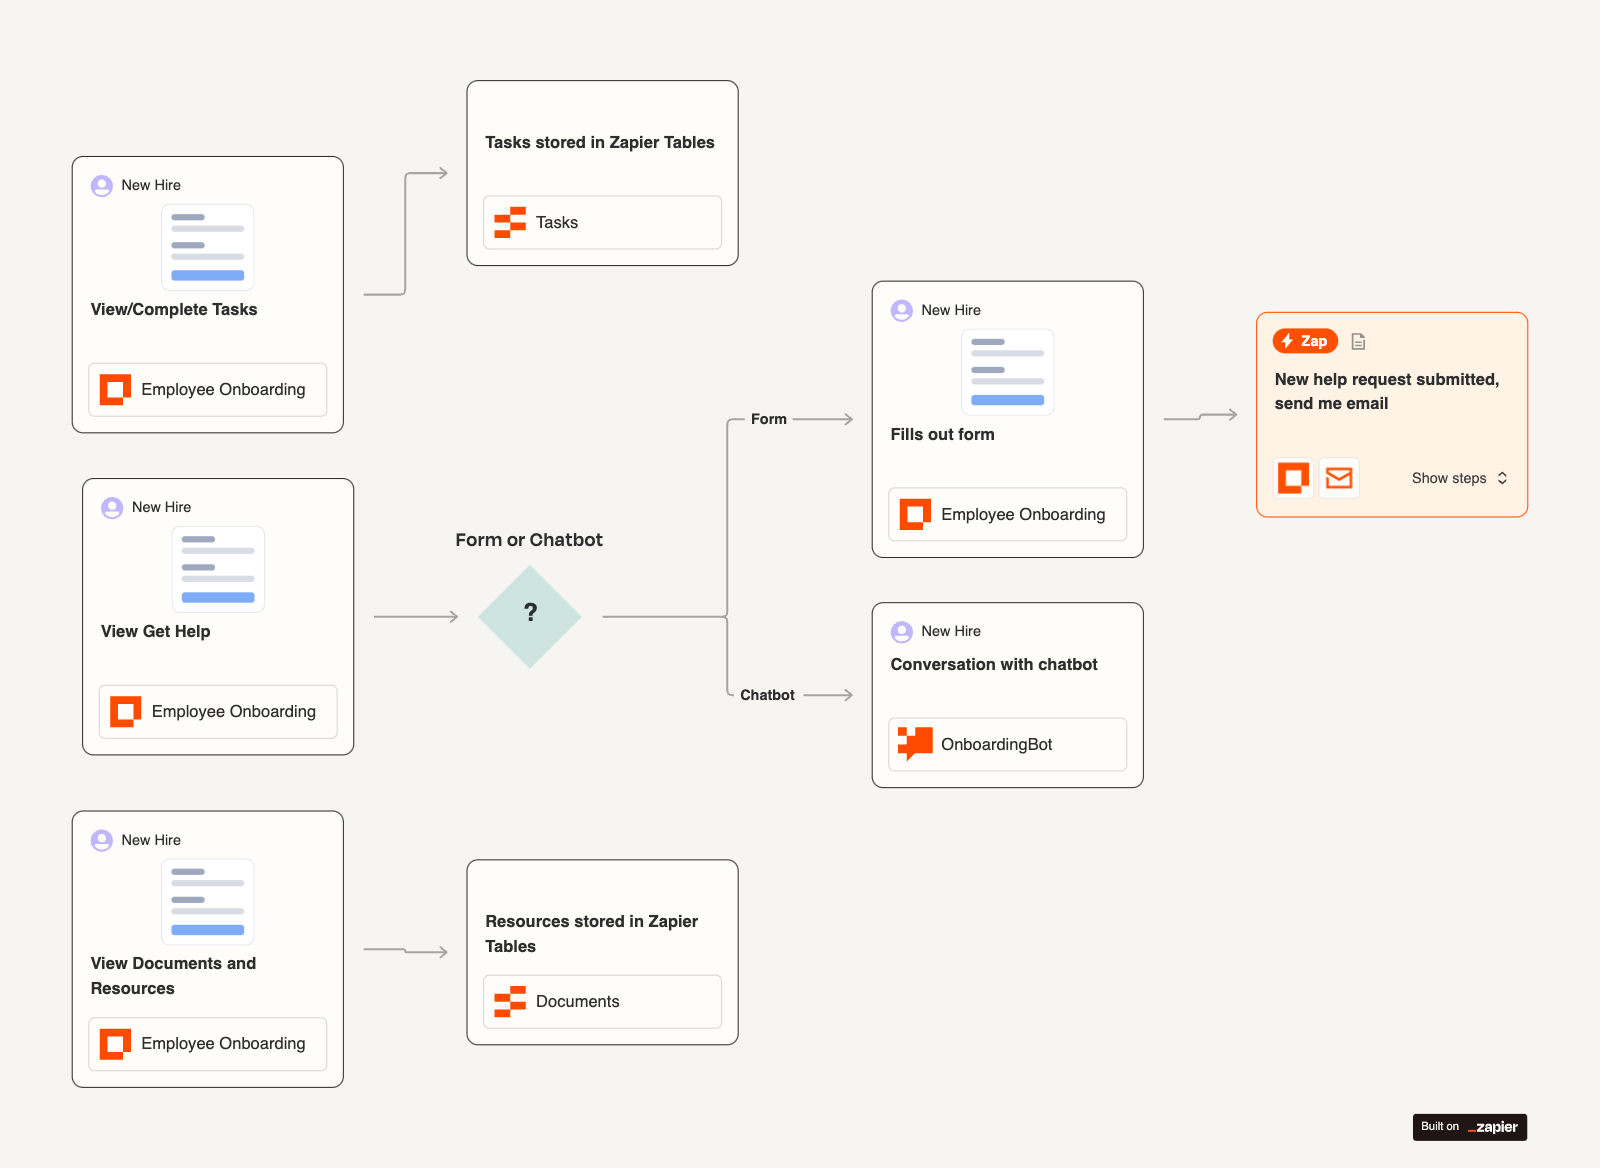
Canvas is a great starting point if you want to map the portal out before you build. For an employee onboarding portal, I’ll start with three main pages:
- Task list
- Get help
- Documents and resources
From there, I’ll have two tables to store tasks and documents. Then, a form and a chatbot for the get help page. Lastly, a Zap will send me an email for new form submissions.
We’ve got it all mapped out. You can create the basic interface, tables, chatbots, and Zaps all from within Canvas.

Steps to cross the finish line
The portal template does all the heavy lifting, but there are a few things to do before sending new hires it’s way. I’ll highlight the three most important things to adjust:
- Access & Users
- Tasks and Document list
- Chatbot directive
Build once, use a million times, right? Let’s not reinvent the wheel. So, to make this portal useful for all of your new hires you’ll need to adjust what each new hire sees.
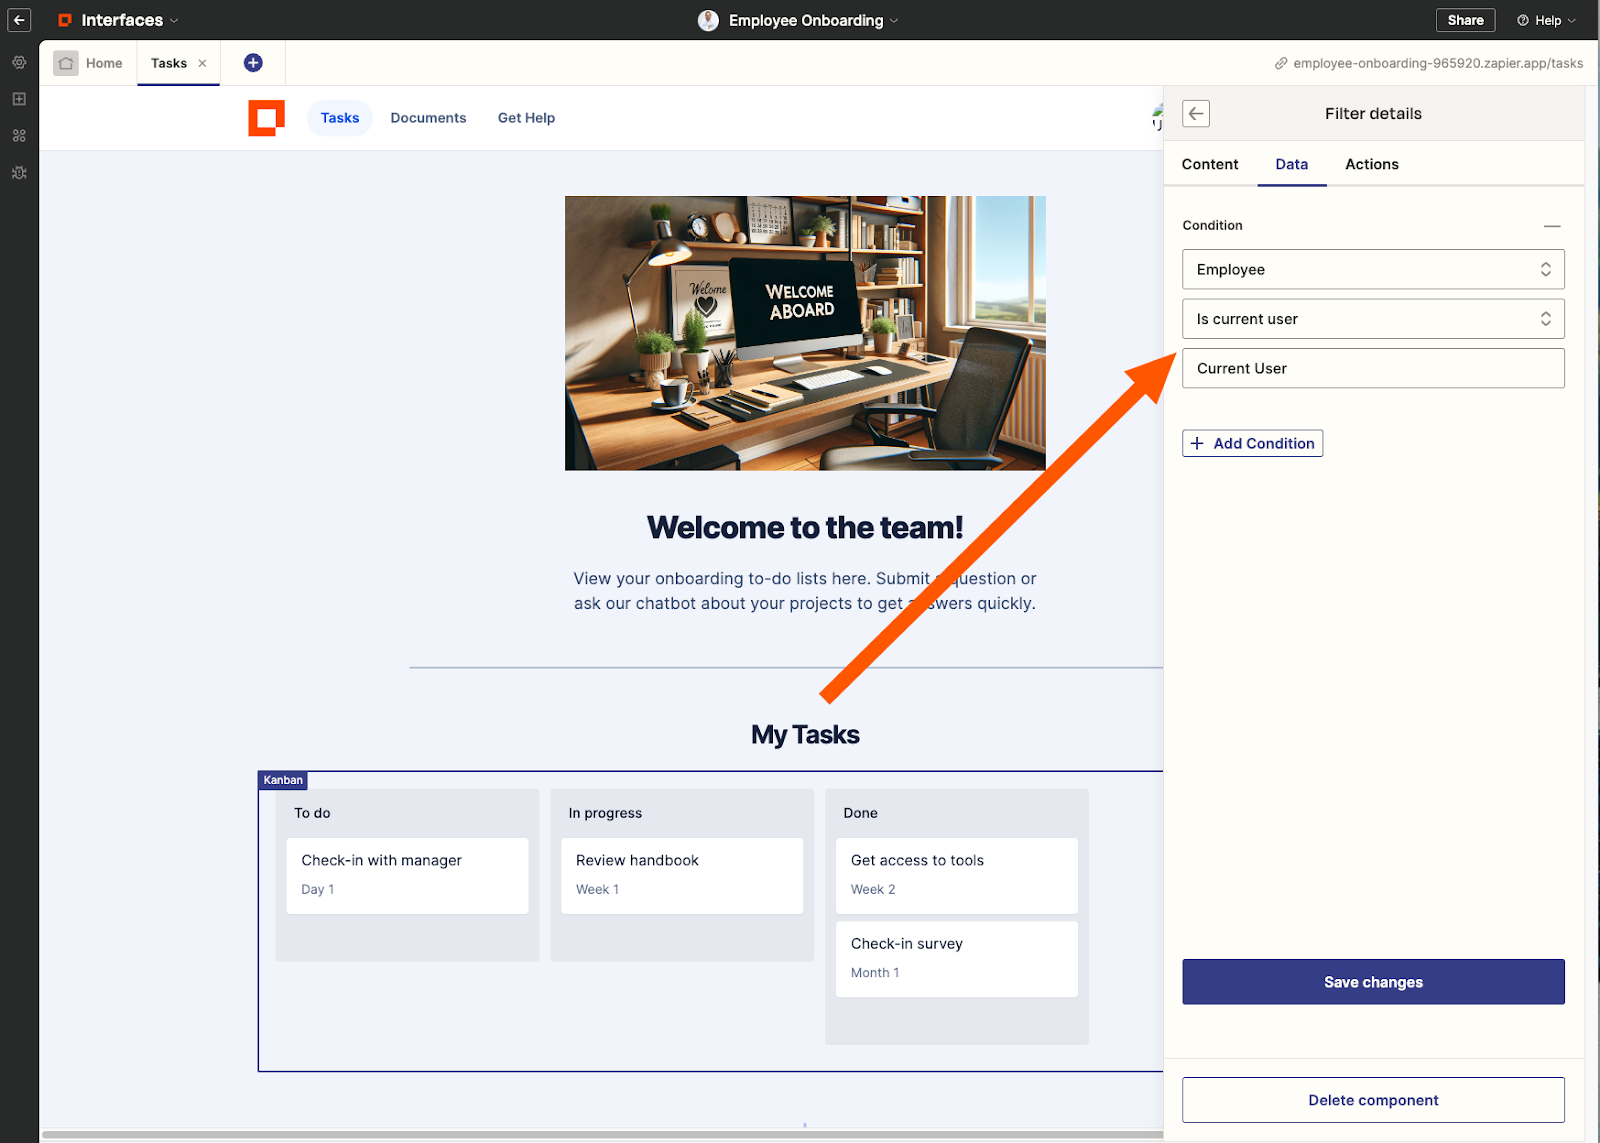
For each set of tasks and documents, there is a field called “Employee”. This is an email field. In an initial onboarding Zap (that you should set up!), I’d include the creation of a set of onboarding tasks and related documents that include the new hire’s email address that go into the tables from the portal.

Back in the portal, you’d make sure Access & Users is “Managed Users” only and adjust each table to filter on employee = current user. That way, each new hire only sees their own tasks and related documents.

I had a lot of fun building this one. It’s about as close to riding a 70s motorcycle as I’ve gotten in awhile.
To recap:
- Use the employee onboarding template to get started
- Remember to use Canvas to plan out projects and apps like this
- Customize with managed users and filters
That’s all for this week!
Happy Building,
Bryce

