Integrate Zapier and Bubble using webhooks
If you want to send data from your Bubble project into some other app like Google Sheets, Airtable, or Gmail, then you may want to use Zapier.
If you want to send data from your Bubble project into some other app like Google Sheets, Airtable, or Gmail, then you may want to use Zapier. Zapier will connect your data to 5,000+ other apps, no coding required.
Here's how you integrate Zapier and Bubble using webhooks:
- Add the Zapier (legacy) plugin.
- Setup a Zap using "Webhooks by Zapier" as a trigger step
- Create a workflow in Bubble using "Trigger a Zapier Zap"
Skip to the walkthrough by clicking here or continue reading for some more context around why you might use Zapier and Bubble.
3 benefits of using Zapier with your Bubble project are:
- Save time. Instead of connecting to other apps' APIs via Bubble, just connect to Zapier and Zapier has 5,000+ integrations already set up.
- Low maintenance. Zapier will update integrations for you.
- Easy formatting. Zapier offers no-code formatting steps that can change the data you send to other apps.
Here are 3 examples of why you might use Zapier in Bubble
- Contact us forms. Send submission data from a form you have in your Bubble project to Google Sheets and then send a personalized email from Gmail to the submitter.
- Scheduling workshops. Send submission data from a booking form to Google Calendar to create an event.
- Team notifications. Send a notification in your company's Slack channel anytime a new user signs up for your Bubble app.
The possibilities are endless. However, the use cases for using Zapier are focused on your own internal processes vs. extending functionality of your app for users. For instance, you could use Zapier to help route support tickets from your app's users to the right people on your team. What you couldn't do is allow users of your app to route uploaded files to their personal Dropbox account using Zapier.
So, think of using Zapier in Bubble as helping improve the processes for the team building the app in Bubble.
Here's how to set up Zapier inside of Bubble in 3 steps
- Add the Zapier (Legacy) plugin.
- Setup a Zap using "Webhooks by Zapier" as a trigger step
- Create a workflow in Bubble using "Trigger a Zapier Zap"
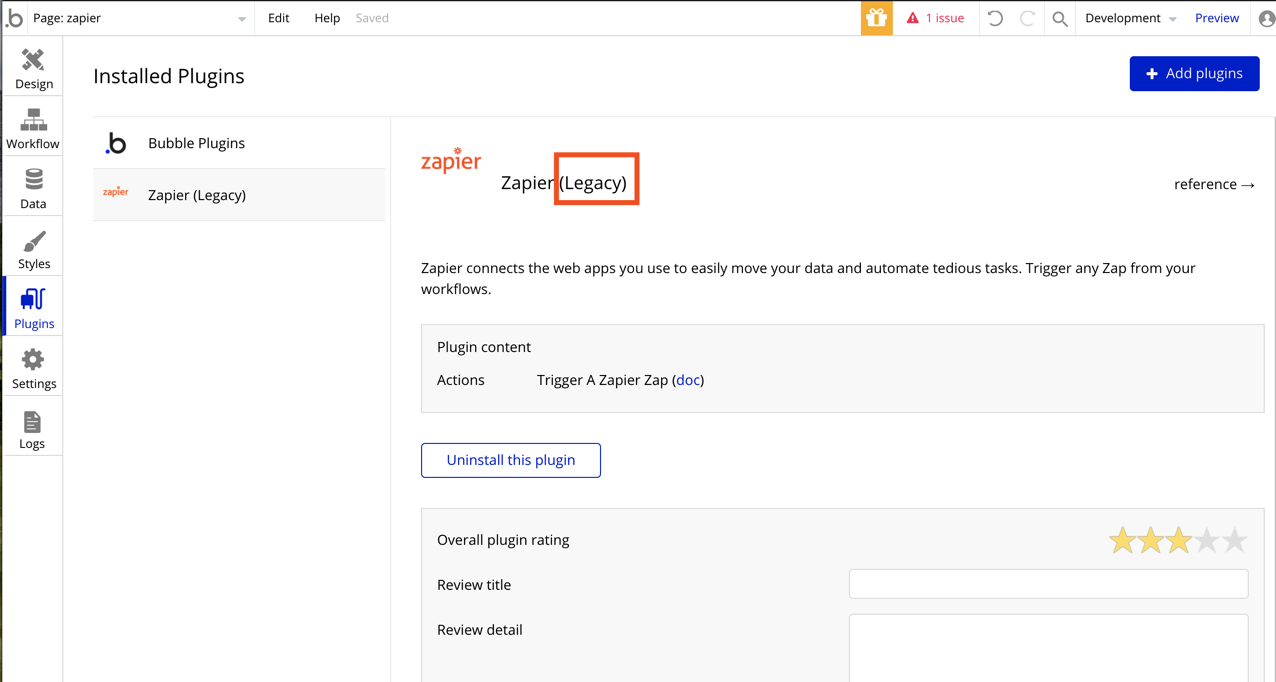
1. Add the Zapier (Legacy) plugin. Within a Bubble project, navigate to the Plugin page and search for Zapier to install:
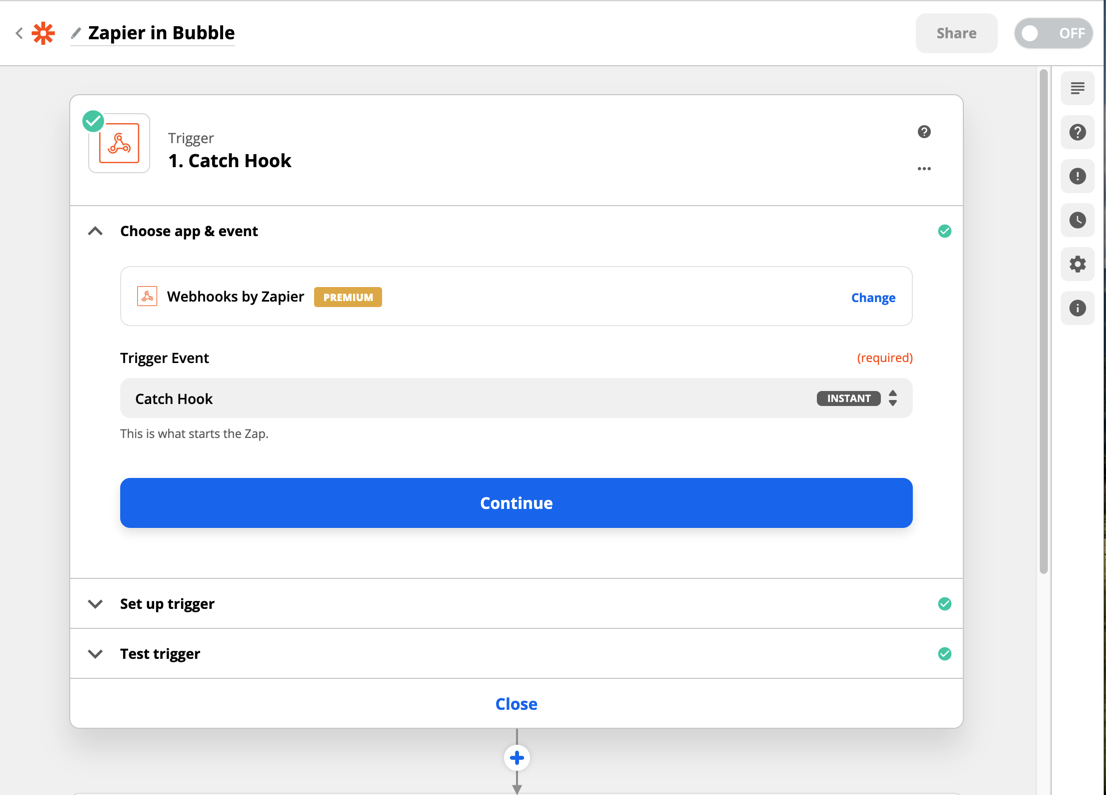
2. Set up a Zap using "Webhooks by Zapier" as a trigger step. This requires a paid (or trial) Zapier account to use Webhooks. If you want a cheaper but more confusing way to integrate, create a free Zapier account and click this link to get the private Bubble app integration on Zapier that acts similar to Webhooks by Zapier.
Set up the webhook trigger:
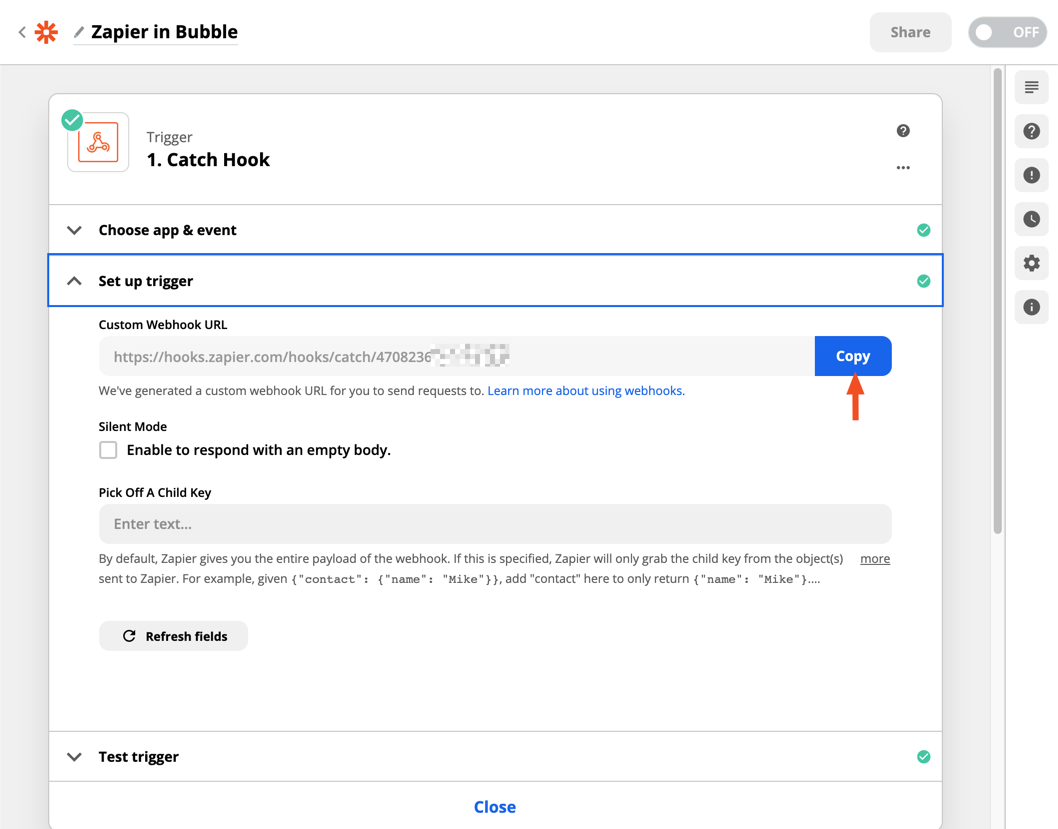
Copy the webhook URL that is automatically generated:
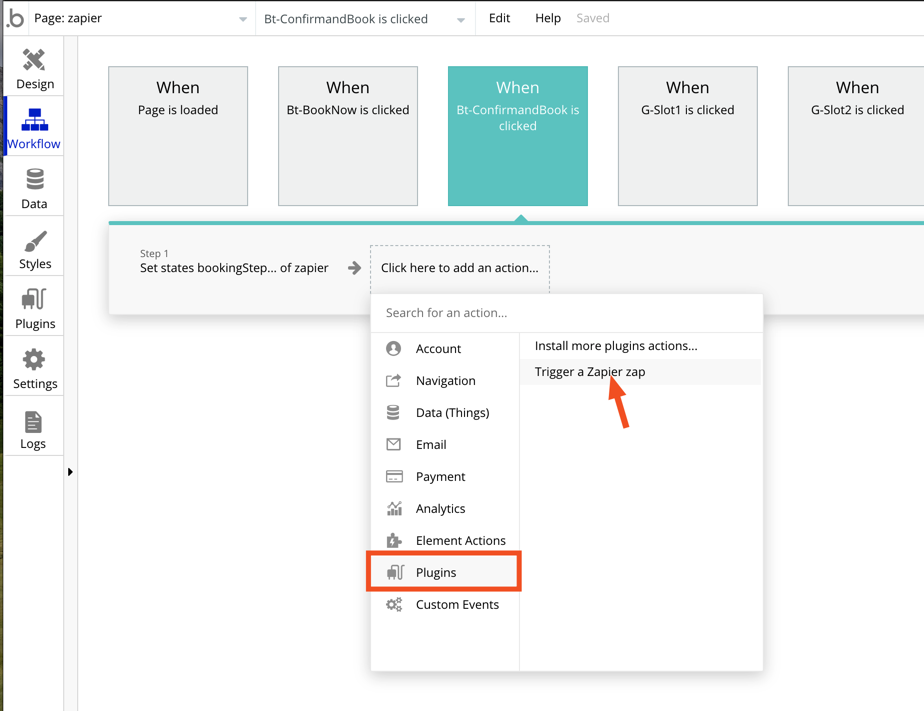
3. Create a workflow in Bubble using "Trigger a Zapier Zap"
It may be helpful to already have a form set up with inputs and a "submit" button to test the integration. Add a workflow to the "submit" button, first. Then, add a new step to the workflow to "Trigger a Zapier Zap":
Paste in the copied webhook URL from the Zapier Zap:
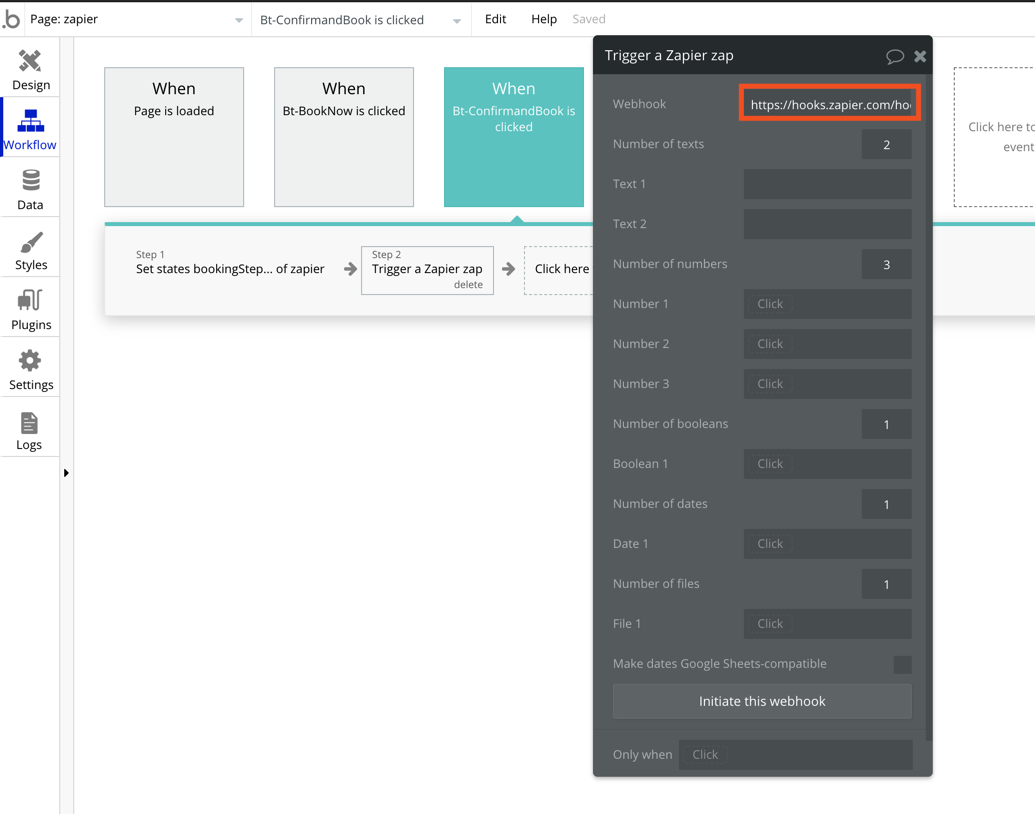
Then, you can determine how many different fields and of what type you want to use to send over to Zapier. For a contact us form, you may just want 3 text fields. One for their name, one for their email, and one for their message. Insert dynamic values to populate these test fields.
No need to do anything else in Bubble to set it up (the "Initiate this webhook" isn't going to be necessary).
The last step is to test.
Go ahead and preview your Bubble form that you created and fill it out. Click your "submit" button to start the workflow you just created.
Then, back in the Zap, you'll grab the information you created by running a test on the trigger:
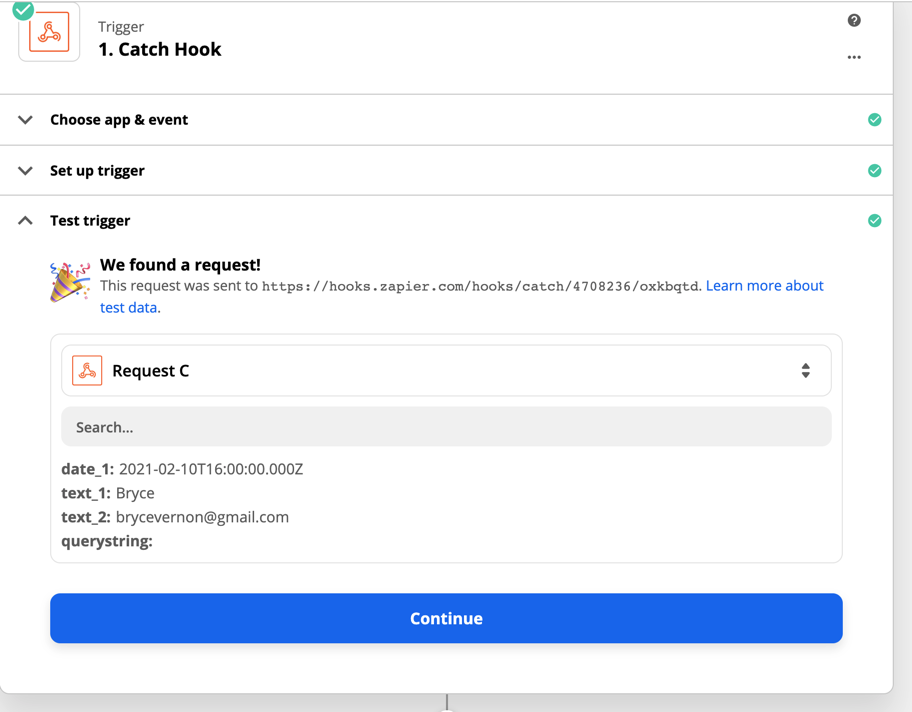
From there, you can map the data into any other app that is on Zapier. There are over 5,000.
Happy building,
Bryce

