Here's how to integrate Zapier and Bubble (step-by-step with pictures)
If you want to send data from your Bubble project into some other app like Google Sheets, Airtable, or Gmail, then you may want to use Zapier.
[Feb 2021] This post has been updated to reflect the new Bubble beta app on Zapier and the new Zapier plugin on Bubble. For instructions on how to use webhooks in Zapier, instead (which can be a simpler integration), see How to integrate Zapier and Bubble with webhooks.
If you want to send data from your Bubble project into some other app like Google Sheets, Airtable, or Gmail, then you may want to use Zapier. Zapier will connect your data to 3,000+ other apps, no coding required.
Here's how you integrate Zapier and Bubble to trigger a Zap:
- Add the Zapier plugin in Bubble.
- Configure the plugin to add a specific trigger that you will use in Zapier along with the data type you will send to Zapier.
- Create a workflow in Bubble using "Trigger a Zapier Zap"
- Setup a Zap using Bubble
3 benefits of using Zapier with your Bubble project are:
- Save time. Instead of connecting to other apps' APIs via Bubble, just connect to Zapier and Zapier has 2,000+ integrations already set up.
- Low maintenance. Zapier will update integrations for you.
- Easy formatting. Zapier offers no-code formatting steps that can change the data you send to other apps.
Here are 4 examples of why you might use Zapier in Bubble
- Contact us forms. Send submission data from a form you have in your Bubble project to Google Sheets and then send a personalized email from Gmail to the submitter.
- Scheduling workshops. Send submission data from a booking form to Google Calendar to create an event.
- Team notifications. Send a notification in your company's Slack channel anytime a new user signs up for your Bubble app.
- Push changes to your Bubble App by using something like Airtable as the trigger so that any time a change happens in Airtable, a Bubble thing is updated.
The possibilities are endless. With the new Bubble app on Zapier, actions are now available which make it possible to change or add a thing in your Bubble app. This could extend functionality for your users! For instance, let's say you let users submit new resources for a directory list you have. First, they'd submit a resource. Then, you could have it sent into Airtable. Then, when you change a field in Airtable to "approve" the new resource, you could then create a new resource in your app.
Here's how to set up Zapier inside of Bubble in 4 steps
- Add the Zapier plugin in Bubble.
- Configure the plugin to add a specific trigger that you will use in Zapier along with the data type you will send to Zapier.
- Create a workflow in Bubble using "Trigger a Zapier Zap"
- Setup a Zap using Bubble
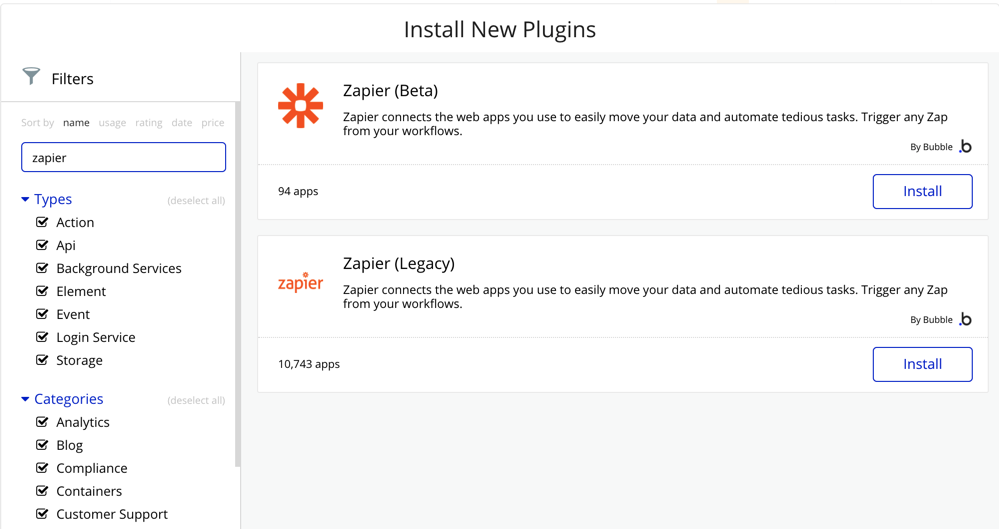
1. Add the Zapier (Beta) plugin. Within a Bubble project, navigate to the Plugin page and search for Zapier to install:
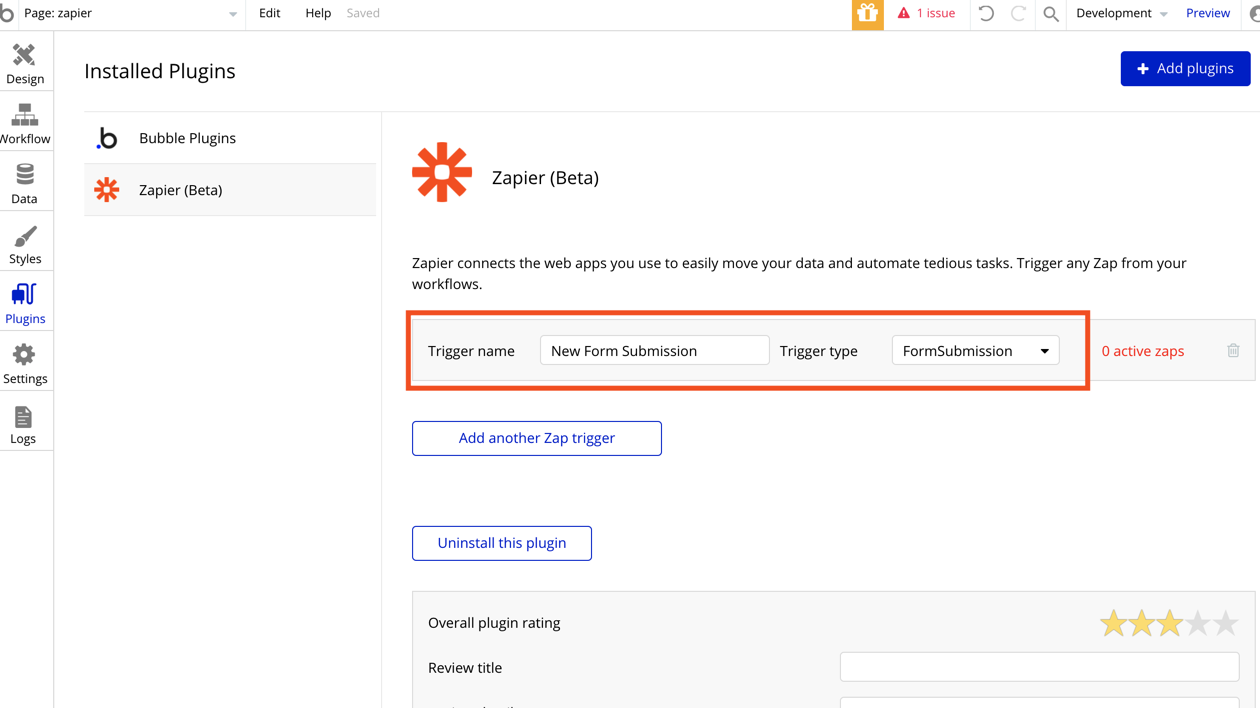
2. Configure the plugin. Name the trigger (for reference only within the workflow section of Bubble and when selecting the workflow from within Zapier) and then choose which data type will be sent into Zapier. For instance, if you want to trigger a Zap when a form is submitted, you need to create a "form" data type. That way, you choose the form data type in the plugin set up and ultimately send over the values submitted in the form to Zapier.
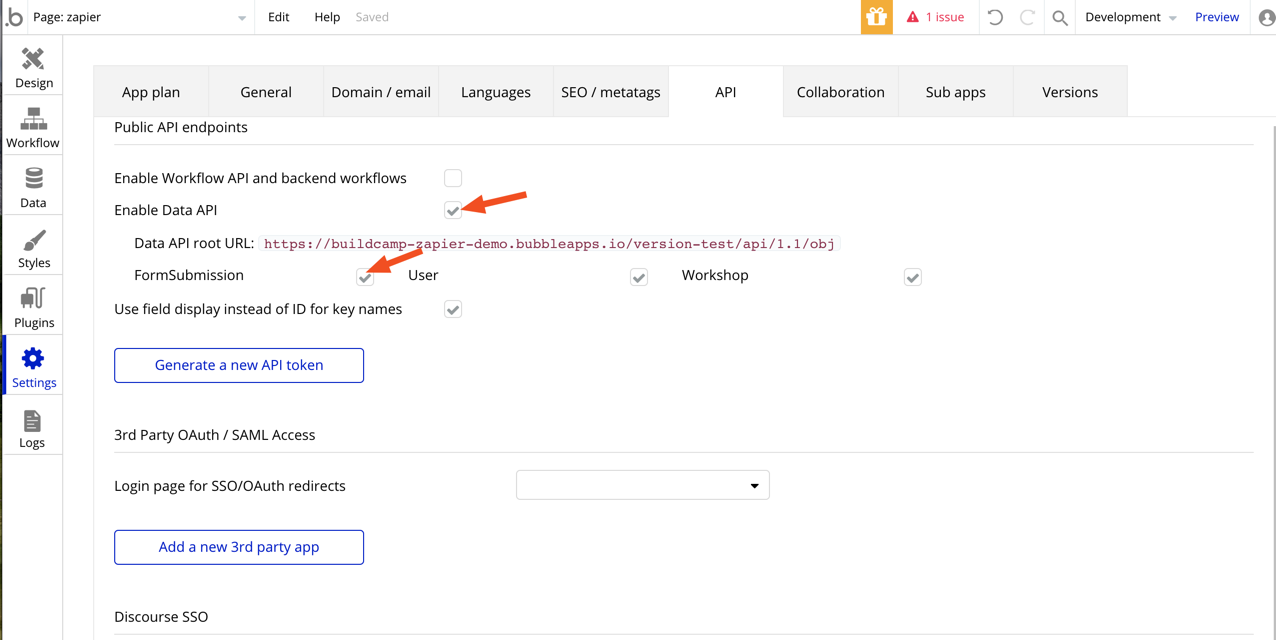
⚡️IMPORTANT! In order for Zapier to "see" the data you send from your Bubble app, you need to enable the data API for your app and make sure the data type you are sending is selected:
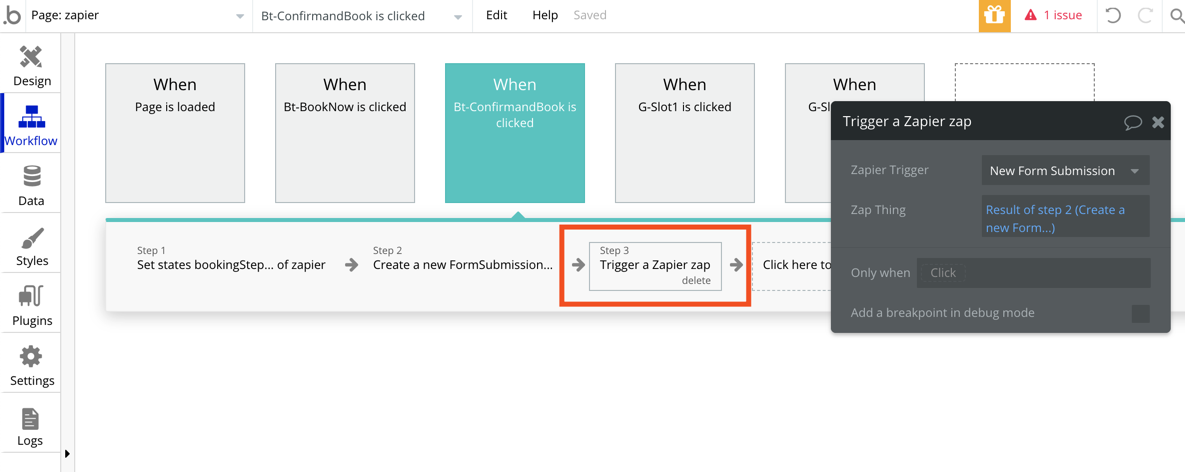
3. Create a workflow in Bubble using "Trigger a Zapier Zap." You'll see this action in "Plugins" > Trigger a Zapier Zap. You'll want to make sure the data type you are sending into Zapier can be accessed. For instance, for a form submission, make sure there is a previous action step that creates a new "form submission" so that the result can be mapped into the "Zap thing."
Choose the trigger you named in the plugin set up and then map in the thing to send to Zapier:
4. Set up a Zap. Connect your Bubble account, choose the app, the app version, and then the "Zap ID" which is the same as the "Zap Trigger" in Bubble that you set up in the Plugin settings and also selected in the workflow action:
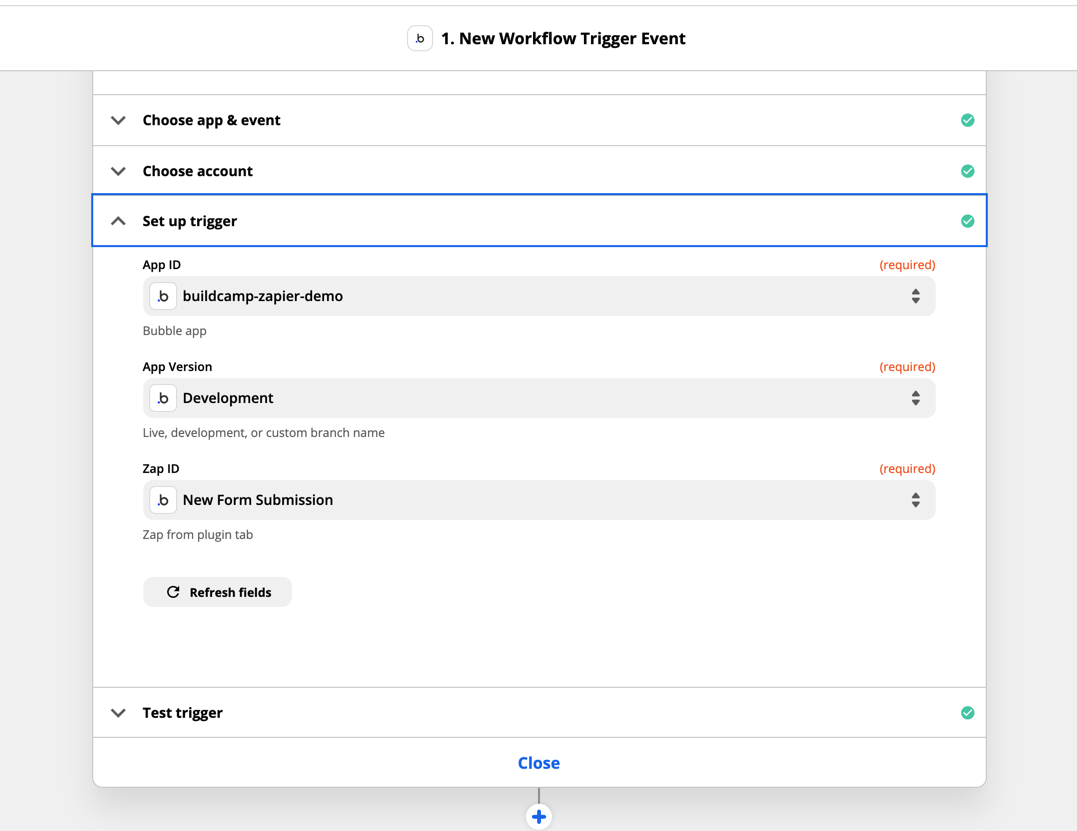
Preview your app in Bubble and perform the action that will kick off the workflow and send the data type into Zapier. For my example, I completed a form which sent the form submission to Zapier. When testing the trigger in Zapier, the information will come through for use in other steps in the Zap (like sending it to Google Sheets or something else):
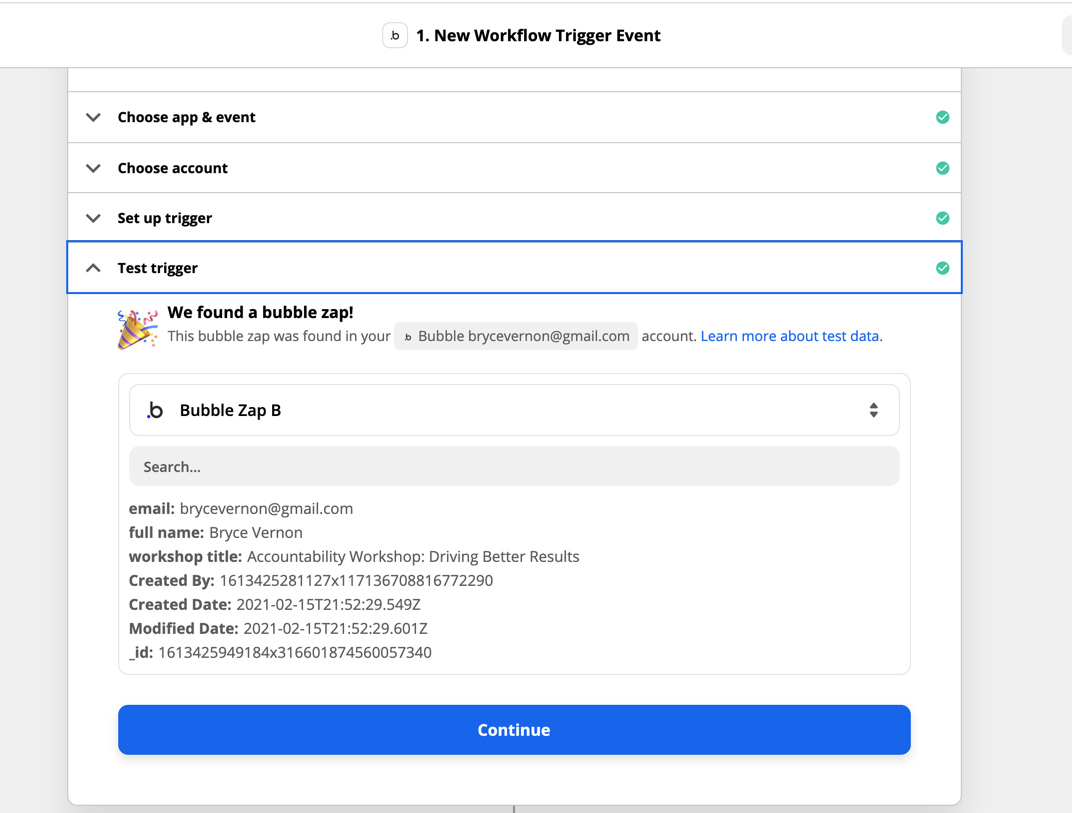
Send the data to over 5,000+ different apps that integrate on Zapier! Or set up a Zap that uses a Bubble action.
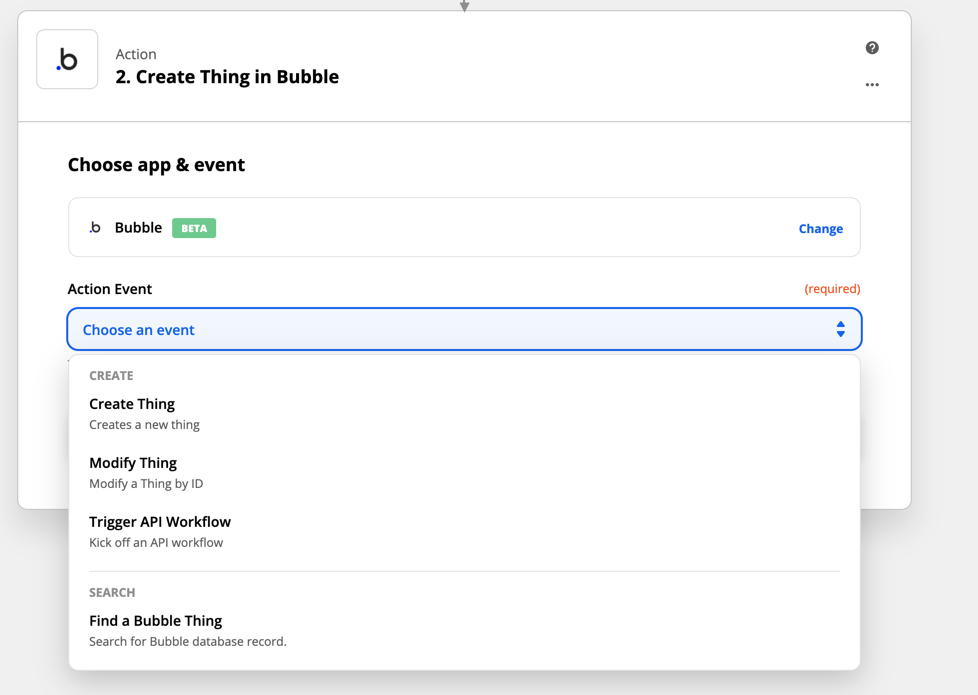
With over 5,000 apps on Zapier, you can do just about anything you could imagine. Go to the Bubble integration page here to play around with what's possible and connect Bubble to another app. There's also so much more you can do with a Bubble action in Zapier. You can choose a trigger from any other app and then have it create a thing, modify a thing, kick off an API workflow, or find a thing for another step:
Most of what you can do with Zapier you can achieve through a Bubble plugin or their API connector. But it's so much easier in Zapier! I imagine there will be many use-cases that come out of this new Bubble app on Zapier. Be sure to share on Twitter and no-code forums!
Happy building,
Bryce

